Tuesday, February 11, 2014

Sculpting the Face through Makeup

Suffering from acne scars? Uneven skin tone? Big nose? Double chin? Saggy cheekbones? Well makeup could be your remedy. 

I'm sure plenty of people have heard of contour and highlight which sculpts the face and hides all the imperfections. This technique can give you a flawless finish alongside the eye makeup and lips.

Here is how it's done:
• first of, use foundation all over skin to even out skin tone

• then use the concealer to dab under the eyes, on the bridge of your nose, on your cuspids bow, on your forehead ( a T shaped highlight basically) to conceal imperfections

• then use the bronzer to dab on the corner of your nose and under tip of nose, under your lower lip, on jaw line, outer edge of your forehead, and around your cheekbone to sculpt 

•then use highlighter to highlight ( or accentuate) certain features like above cheekbones for a shiny and healthy appearance

Here's the finished result!


Monday, February 10, 2014

Eliminate Blackheads and Acne

Big pores, blackheads, whiteheads, and acne are a daily struggle for many. Trying to formulate the right recipe of products to remove them is time consuming and frustrating. 

I suffered all these symptoms over the years and have researched to see what really works and what doesn't. 

Due to dirt buildup, blackheads form especially around the nose area. Due to excess oil, whiteheads form. Due to hormonal changes, genetics, and clogged pores, acne surfaces. 

So I have developed a daily routine to eliminate or at least alleviate some of these breakouts. 

• use Biore Pore Strips to remove blackheads on nose. After dabbing a bit of water on nose, place strip for few minutes and remove for immediate results
 
• use a Clean & Clear cleanser ( or other brand) to remove dirt buildup from the skin every night before sleeping 
• use a Clean & Clear exfoliator ( or other brands) once a week to remove all dead skin buildup ( which causes acne) 
• after the cleanser and exfoliator and pore strips, use an acne control moisturizer to seal in moisture for skin because the above steps can strip the skin from all oils 
• once a week, use a skin mask. I use Proactive Refining Mask. I place it on skin for ten minutes and remove with water
• try to use cold water on face rather than hot water to keep shine and moisture 

• always use products with salicylic acid or benzoyl peroxide ingredients in them because these ingredients fight acne


Friday, February 7, 2014

Lip Treatments

I, for one, suffer from chapped lips. Especially during the winter time, the dry air creates chapped and cracked lips.

The best solution is to apply lip balm every time you experience chapped lips. Lip balms offer soothing ingredients for softer lips. You should also consider getting a lip balm with SPF in it so it could protect the lips from the damaging rays of the sun. 

The lip suffers decrease in collagen and lip volume over time. The lips age as well so we must take care of them. 

I suggest using a lip exfoliant to remove excess dead skin and smoothe out the surface. You could either buy a lip exfoliant or make one at home. Ingredients such as olive oil, honey, and sugar are a great natural exfoliating mix. 


As for soft lips, use a lip balm with SPF whenever you go out and a lip balm for nighttime as well. They come in different colors! 


Thursday, February 6, 2014

Hijab Style - The Volumizing Scrunchie

Hijabis have long been the center of attention for many people. Regardless, hijab has represented the modest wear of Muslim women today. 

To keep up with modern times and trends, the Volumizing scrunchie came about. It creates the ideal volume and lift for your hijab- without looking flat. It is made of soft and fluffy material to tie around your hair before you put on your hijab. 

I have used mine for 2 years and it gives me a perfect lift without looking unnatural. It creates the best bob without pulling out hair. It comes in different colors.

The creator YazTheSpaz, YouTube hijabi blogger, sells them on her website YazTheSpaz.com


*photo credit: yazthespaz

Wednesday, February 5, 2014

Day/Night Skincare Routine

Some of us suffer from skin problems but sticking to a daily and nightly Skincare routine could drastically improve your skin. Depending on your skin type ( oily, dry, sensitive, or combination), you can customize your Skincare to your needs and notice improvements. 

Since I suffer from oily skin, I have dealt with acne, blackheads, and breakouts for a long time. So I follow my customized Skincare resolutions religiously. My Skincare routine for day/night is as follows:

Day:
• Once I wake up in the morning, I use a clean & clear cleanser
• Then I apply my dual action moisturizer, also by clean & clear (which helps eliminate breakouts) 

For an outing:
• I always use a BB ( blemish balm) cream or CC ( color correction) cream as well as sunscreen (BB and CC creams offer a hint of foundation as well as moisturizer for the perfect blend).

Night:
• Before I go to bed, I exfoliate my face with an exfoliating cleanser ( to remove dirt and dead skin)
• Then I apply my night cream 
• Then I apply my rejuvenating eye cream  ( for under eye dark circles) 
• Then I apply my lip balm and body lotion

Tuesday, February 4, 2014

Beneficial Uses of Natural Oils

People would assume cocunut could only be eaten as a tropical fruit or almond to eat as snacks or avocado to dip with chips. That's not the case. The essential oils have magnificent benefits for the body, skin, hair , and nails. 

I have long been a fan of natural oils and have incorporated them in my daily routine. I have discovered amazing results from them.

For instance, cocunut oil is great not only for cooking but serves as a skin and hair care. It is a luxurious body moisturizer and helps with rashes and skin irritations that you may suffer from. It makes the skin smooth to the touch and glow as well. As for hair, it can be used as a natural hair mask. 


As mentioned in previous post, almond and olive oil are great hair moisturizers. Apply before shower as I previously mentioned in my blog post. 

Castor oil is a natural remedy for various problems. The most popular use for it is by applying it to eyebrows, eyelashes, and hair as a hair growth accelerator. It can help thicken hair, repair damaged hair, and darken the hair roots as well. Just apply a small dab into a cotton swab and apply it to eyebrows or lashes and it will absorbed. Use once daily for results. As for hair, massage onto hair and leave it in for a day before shower. 

Ant egg oil may sound odd to some folks but it is a traditional, middle-eastern based hair removal method. It can eliminate the hair from the root permanently - inhibiting hair growth by weakening the hair root. Any middle eastern female can attest to our lovely genes but this oil has worked miracles to many women who have complained of excessive body hair. After waxing, apply to the area and massage into the skin. Let it soak for about four hours then shower. After months of daily application, you will see results.

Avocado oil is a great face moisturizer as well as used for dry scalp mask. It is beneficial for hair, skin, and nails. 

Monday, February 3, 2014

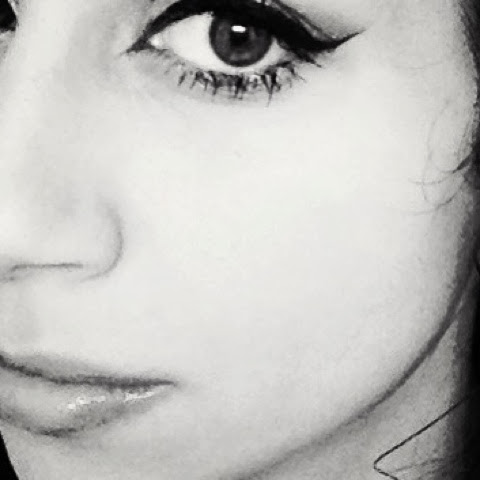
Achieving the Perfect Winged Liner

I get so many questions on how I create my eyeliner, specifically to compliment my eye shape and eye color.

Achieving the perfect winged liner is difficult and frustrating at first. Many people are afraid to use it. I have had my share of frustrations and failures in the past. Nonetheless, with practice you can achieve the ideal winged liner. 

It is best to use brand and method suitable and comfortable for you. Whether be it pencil liner, gel liner, or liquid liner, it all works. 

My favorite look has been a neutral face but with bold eyes (jet black eyeliner). 

Here are few tips and tricks (for beginners):
• Place a piece of tape in a slant with your water line to guide the shape of the eyeliner 
• Stay as close to the lash line as possible while applying the eyeliner
• Guide the eyeliner as it best compliments your eye shape. Follow the natural curve of the lid of your eyes
• Do not push the eye upwards while lining your eye. The eyes should relax into their natural shape
• Beggining with the inner lid, thinly glide the liner towards the outter lid then draw the wing and fill it in (all the while the tape is still in place)

*check YouTube makeup channels for video tutorials on winged liners